(Optional) Taking Control of the TrampleTek mat in ESPHome
These instructions are optional and only if you want to view device Logs and edit the YAML code directly after doing the Easy Mode Installation.
If you “Take Control” of your TrampleTek Blue, you will still get Home Assistant notifications when there is an update. IF YOU UPDATE YOUR FIRMWARE THROUGH HOME ASSISTANT OTA (Over-the-air) after you have “Taken Control” of the device then IT WILL ERASE YOUR INTERNALLY SAVED WI-FI CREDENTIALS. You will need to use Bluetooth, or the device’s fallback hotspot, or connect via the ESPHome web, or reload the firmware completely using the Easy Mode instructions to get the device reconnected to your Wi-Fi. Alternatively you can look through the TrampleTek Blue YAML code to make the updates yourself instead of using Home Assistant’s OTA update.
These are the step-by-step instructions to “Take Control” of your TrampleTek Blue device in ESPHome.
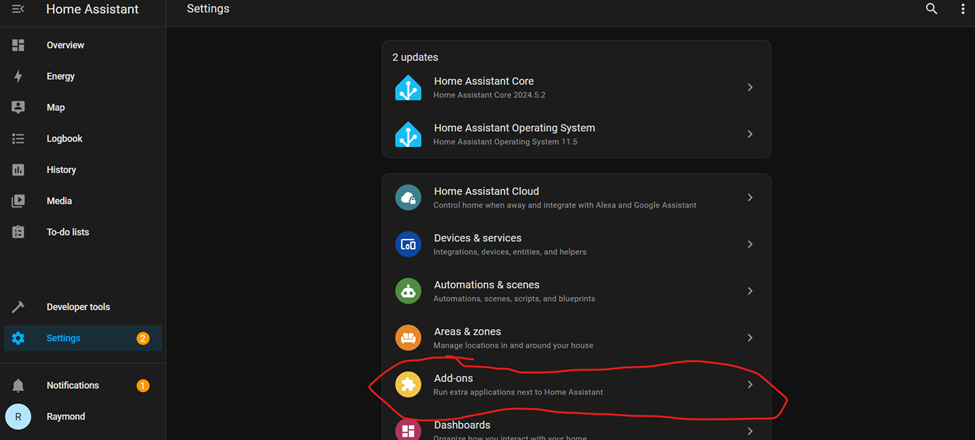
- Open a Home Assistant tab, typically http://homeassistant.local:8123/, and open ESPHome in the Settings -> Add-ons section.
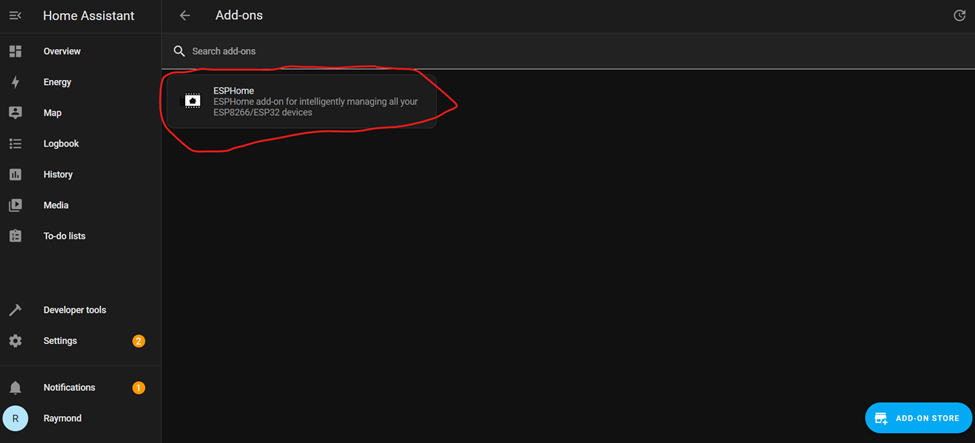
- Select ESPHome.
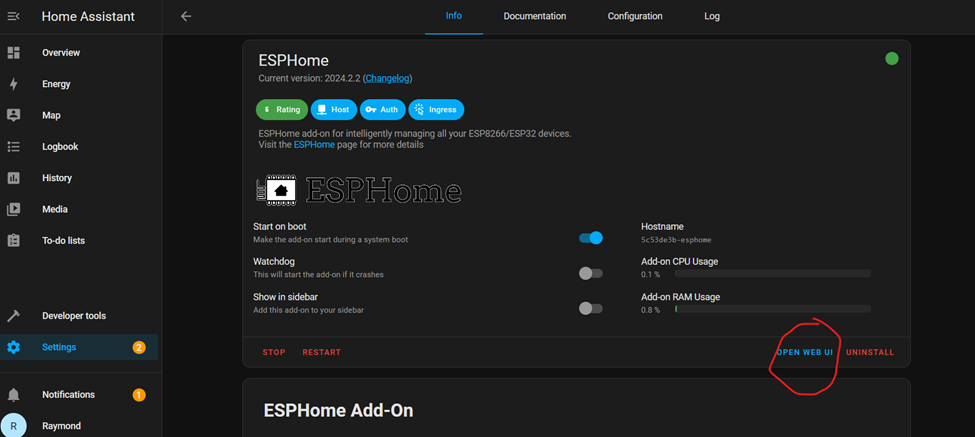
- Open the Web UI.
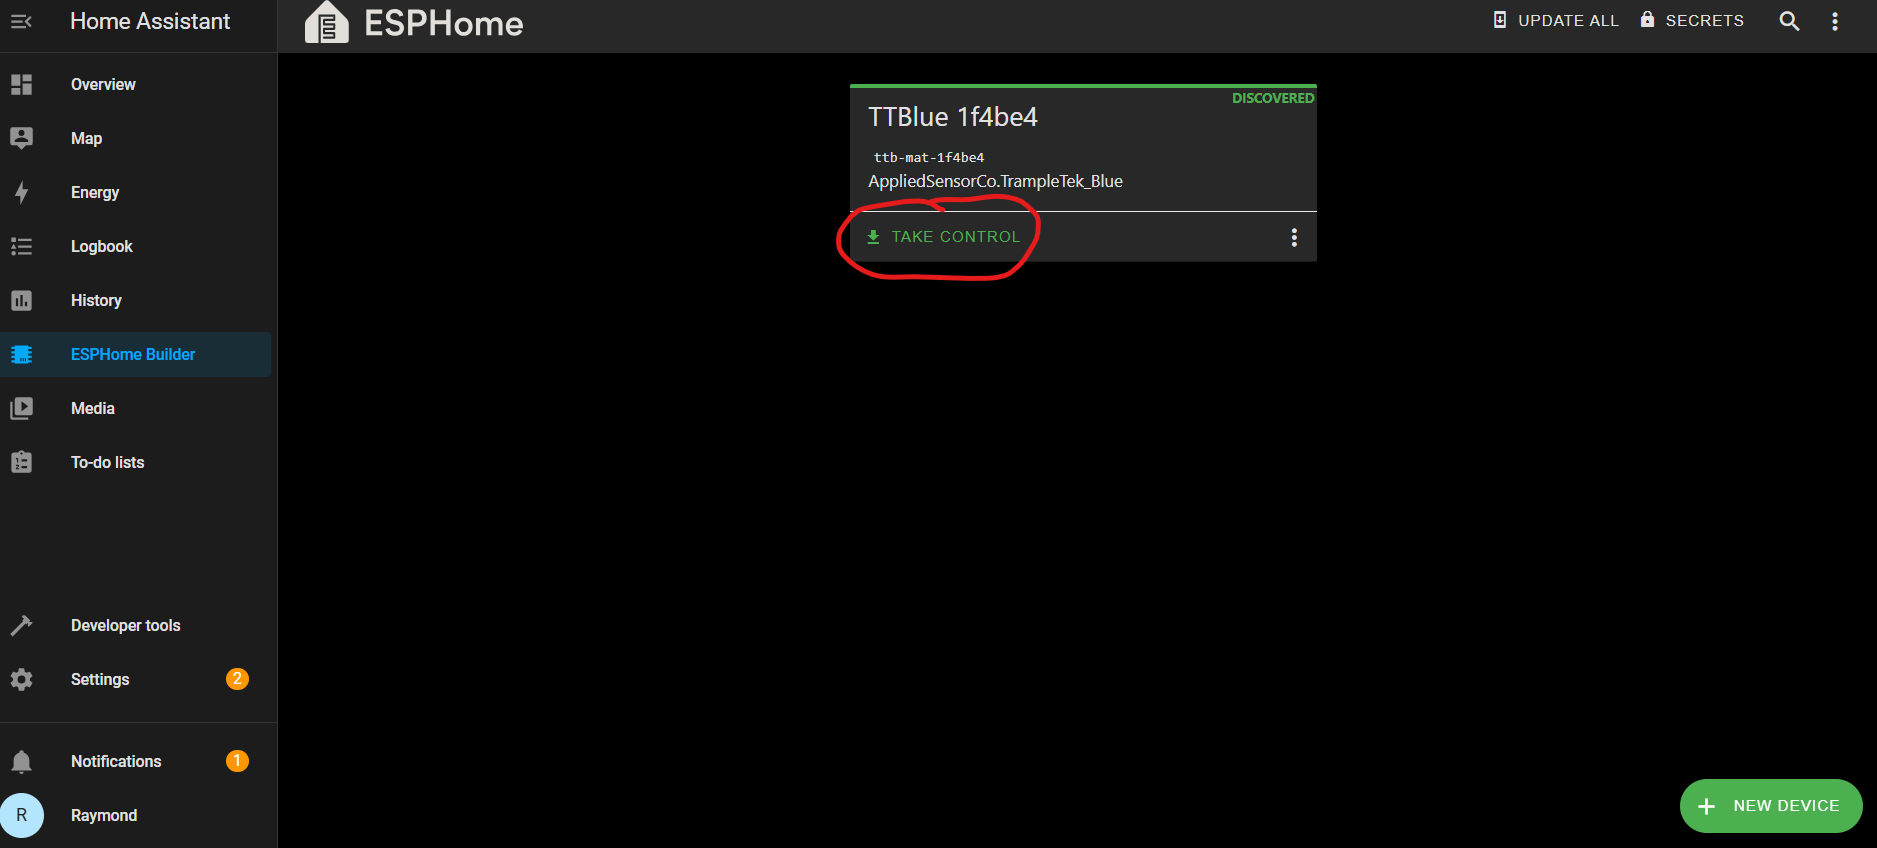
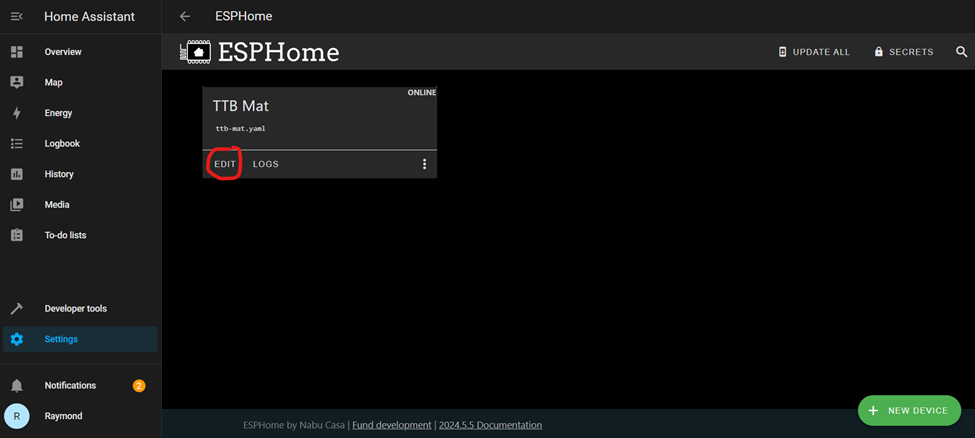
- Your mat will be discovered, but hidden. Click on the “Show” in the top right corner.

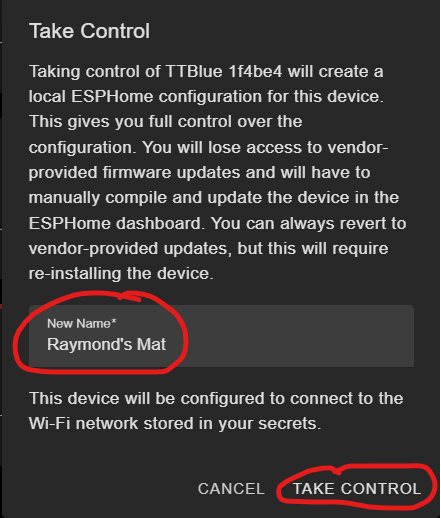
- Click on the “Take Control” once you see the device.
- Give your mat a useful name. I find short but descriptive is best, I picked “Raymond’s Mat”. Click “Take Control”.
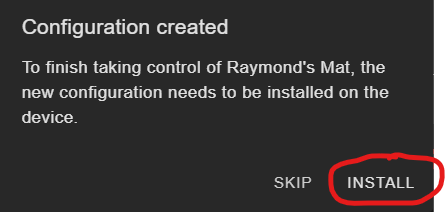
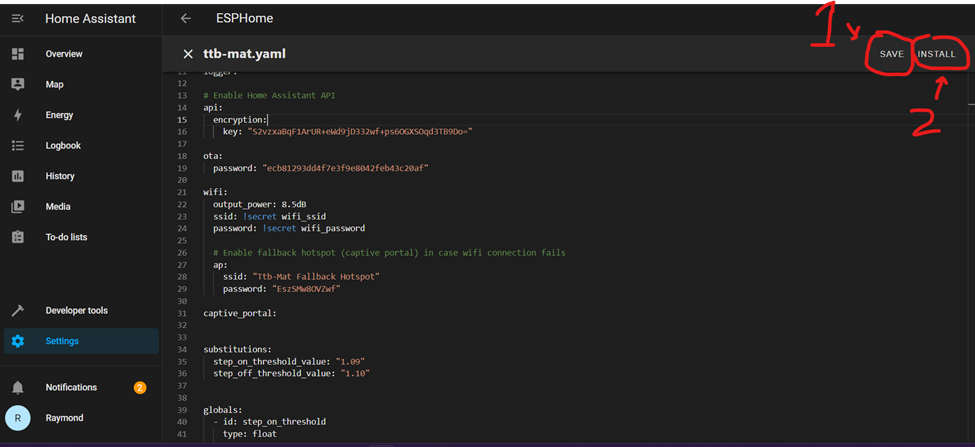
- Now install with your new name! Click “Install”.
- This part is going to take awhile, like 3-4+ minutes. It’s going to build the code and then install it over Wi-Fi. Make sure your mat is in a good place for signal from your router. The underlined bar shows the progress of installing over the Wi-Fi. Sometimes this step fails, go to the bottom of this page for help.

- Eventually you should see this, and you can close the window. Your device’s UI element names should all be updated with your new name, and you can view the YAML code and device logs in the ESPHome UI.

I have seen an Wi-Fi install error that says something like “Error resolving IP address: Error resolving address with mDNS:” when trying to “Take Control”. Sometimes you just need to press “Retry” in the bottom right of LOGS screen (the screenshot above will have a “Retry” button if the upload fails). If that doesn’t work, make sure your ESPHome SECRETS has your Wi-Fi information.
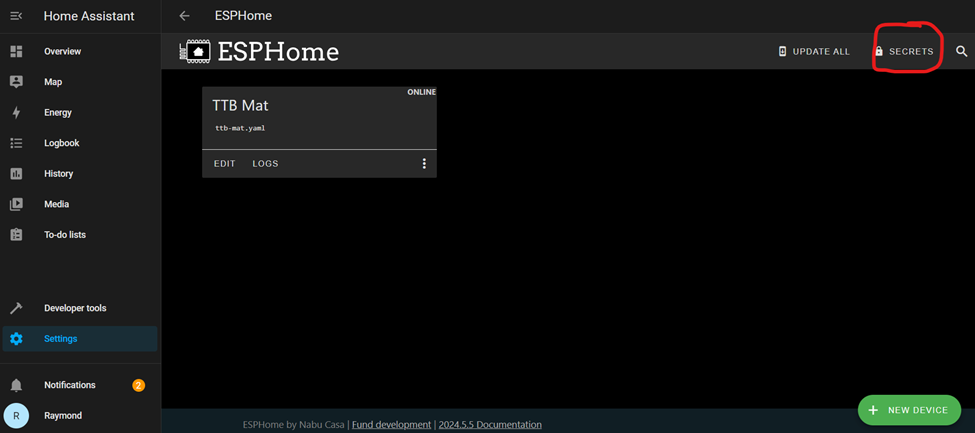
- Get to the ESPHome UI view and click on “Secrets” in the top right corner.
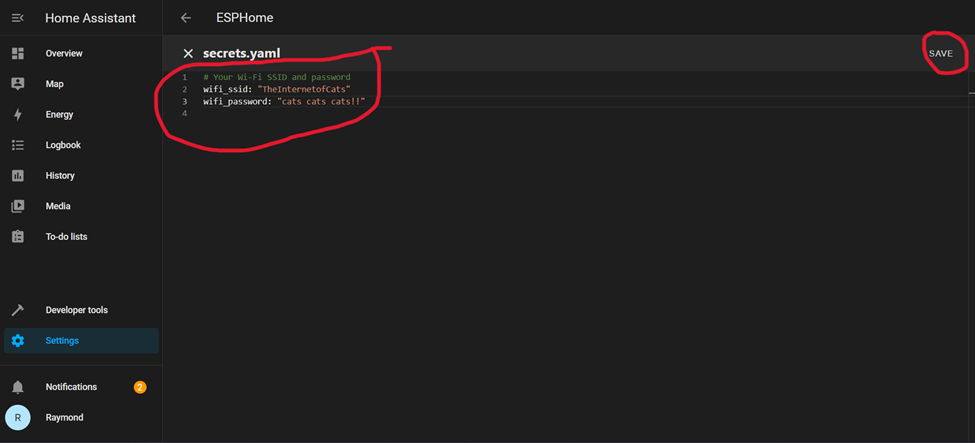
- If this file is empty, follow the structure of the information in the image and put in your SSID and password inside the double quotations just like the made up Wi-Fi details below. Click Save.
- Then go to ESPHome UI and click on “EDIT” for the device and try to install again.
Next Steps
SKIP the Manual Installation section and move directly to understanding the UI elements of the TrampleTek Blue (Home Assistant version).
Please join the ASC Discord server if you have questions or comments about this page.